

How to Use a Keycap Puller and Switch Puller Without Damaging Your Keyboard
Learning how to use a keycap puller and a switch puller correctly is one of the cheapest skills in the hobby and one of the most expensive to skip. A five-second mistake with the wrong tool can scuff a keycap you waited months for, crack a resin artisan, bend the pins on a fresh set of switches, or damage a hot-swap socket soldered to the PCB.
The good news is that removing keycaps and switches safely is almost entirely about technique, not force. This guide covers the keycap puller types, which ones actually damage keycaps, the right way to pull switches from a hot-swap keyboard, and how to avoid and fix bent switch pins.
Why the Right Keyboard Puller Tool Matters
Keycaps and switches are held on by friction and small plastic latches — nothing is screwed down. Every removal is a controlled application of force in one direction, and the tool's job is to keep that force even and vertical. When force goes sideways instead, three things tend to break:
- Keycap walls and finishes — thin ABS caps and coated or painted caps scuff, crack, or lose their finish along the sides.
- Switch stems and housings — the cross-shaped stem can split, and squeezing a switch too hard with a puller can crack the housing.
- Hot-swap sockets — the small metal leaves inside can bend or tear away from the PCB if a switch is levered out at an angle.
A good puller does not make you stronger. It makes you straighter.
Keycap Puller Types: Wire vs Ring vs 2-in-1 Tools
There are three common designs, and the difference between them is genuinely meaningful if you care about your keycaps.
Ring-style plastic keycap pullers
These are the free plastic loops that ship in the box with a lot of keyboards. Push the ring down over the keycap until the prongs catch under the lip, then pull. They work, and for occasional use they are fine.
The problem is where the pressure lands. As the ring slides down, the keycap widens toward its base, so the plastic prongs press harder and harder against the sides of the cap. On smooth or coated keycaps that can leave scratches or rub the finish. The plastic also deforms over time, which makes it grip worse and slip more — and a slipping puller is how caps get gouged.
Wire keycap pullers
A wire keycap puller uses two thin steel loops that hook under the bottom edge of the keycap. Because the contact points sit under the cap rather than clamped against its walls, force lands on the bottom edges only. That is why wire pullers are the default recommendation for removing keycaps without scratching them, and the safer choice for doubleshot sets, dye-sub PBT, and artisans.
The trade-off is a slightly steeper learning curve: you have to seat both wires under opposite edges of the cap before lifting.
2-in-1 keycap and switch puller tools
Most builders use a combination tool: a wire or wire-style keycap puller on one end and a switch puller on the other. The Glacier Keycap/Switch Puller Tool and the Glacier Keycap/Key Switch Tool both combine the two functions in one body, which matters more than it sounds: a full swap means alternating between the two operations dozens of times, and hunting for a second tool is how people start improvising with fingernails and screwdrivers.
How to Remove Keycaps Without Damaging Them
The technique is short. Follow it exactly and you will not lose a keycap.
- Unplug the keyboard first, especially before switch work — you do not want a metal tool bridging contacts on a powered PCB.
- Seat the puller on opposite sides of the cap. For a wire puller, hook both wires under the front and back edges rather than left and right — that gives more clearance on most layouts.
- Pull straight up. Vertical, in line with the switch stem. No twisting, no rocking side to side.
- Wiggle only if it resists. Use a small back-and-forth rock along one axis while keeping upward pressure. Never lever it off.
- Watch for the switch coming with it. On hot-swap boards a tight keycap can lift the whole switch out of its socket. Stop, separate the two by hand, then reseat the switch carefully — a switch dragged out sideways is exactly the scenario that bends pins.
Removing Stabilized Keys: Spacebar, Shift, and Enter
Large keys ride on stabilizers and need extra care. A stabilized keycap is held by the switch stem in the middle and by two stabilizer stems near the ends, so pulling from one side puts a twisting load on the stabilizer housings.
- Pull large keys from the center where possible, and lift a spacebar evenly with both hands.
- Expect more resistance than a 1u key. That is normal, and not a reason to add force.
- Check the stabilizer wire afterward — a wire that has popped out of its stem will bend things when you reinstall the cap.
How to Use a Switch Puller on a Hot-Swap Keyboard
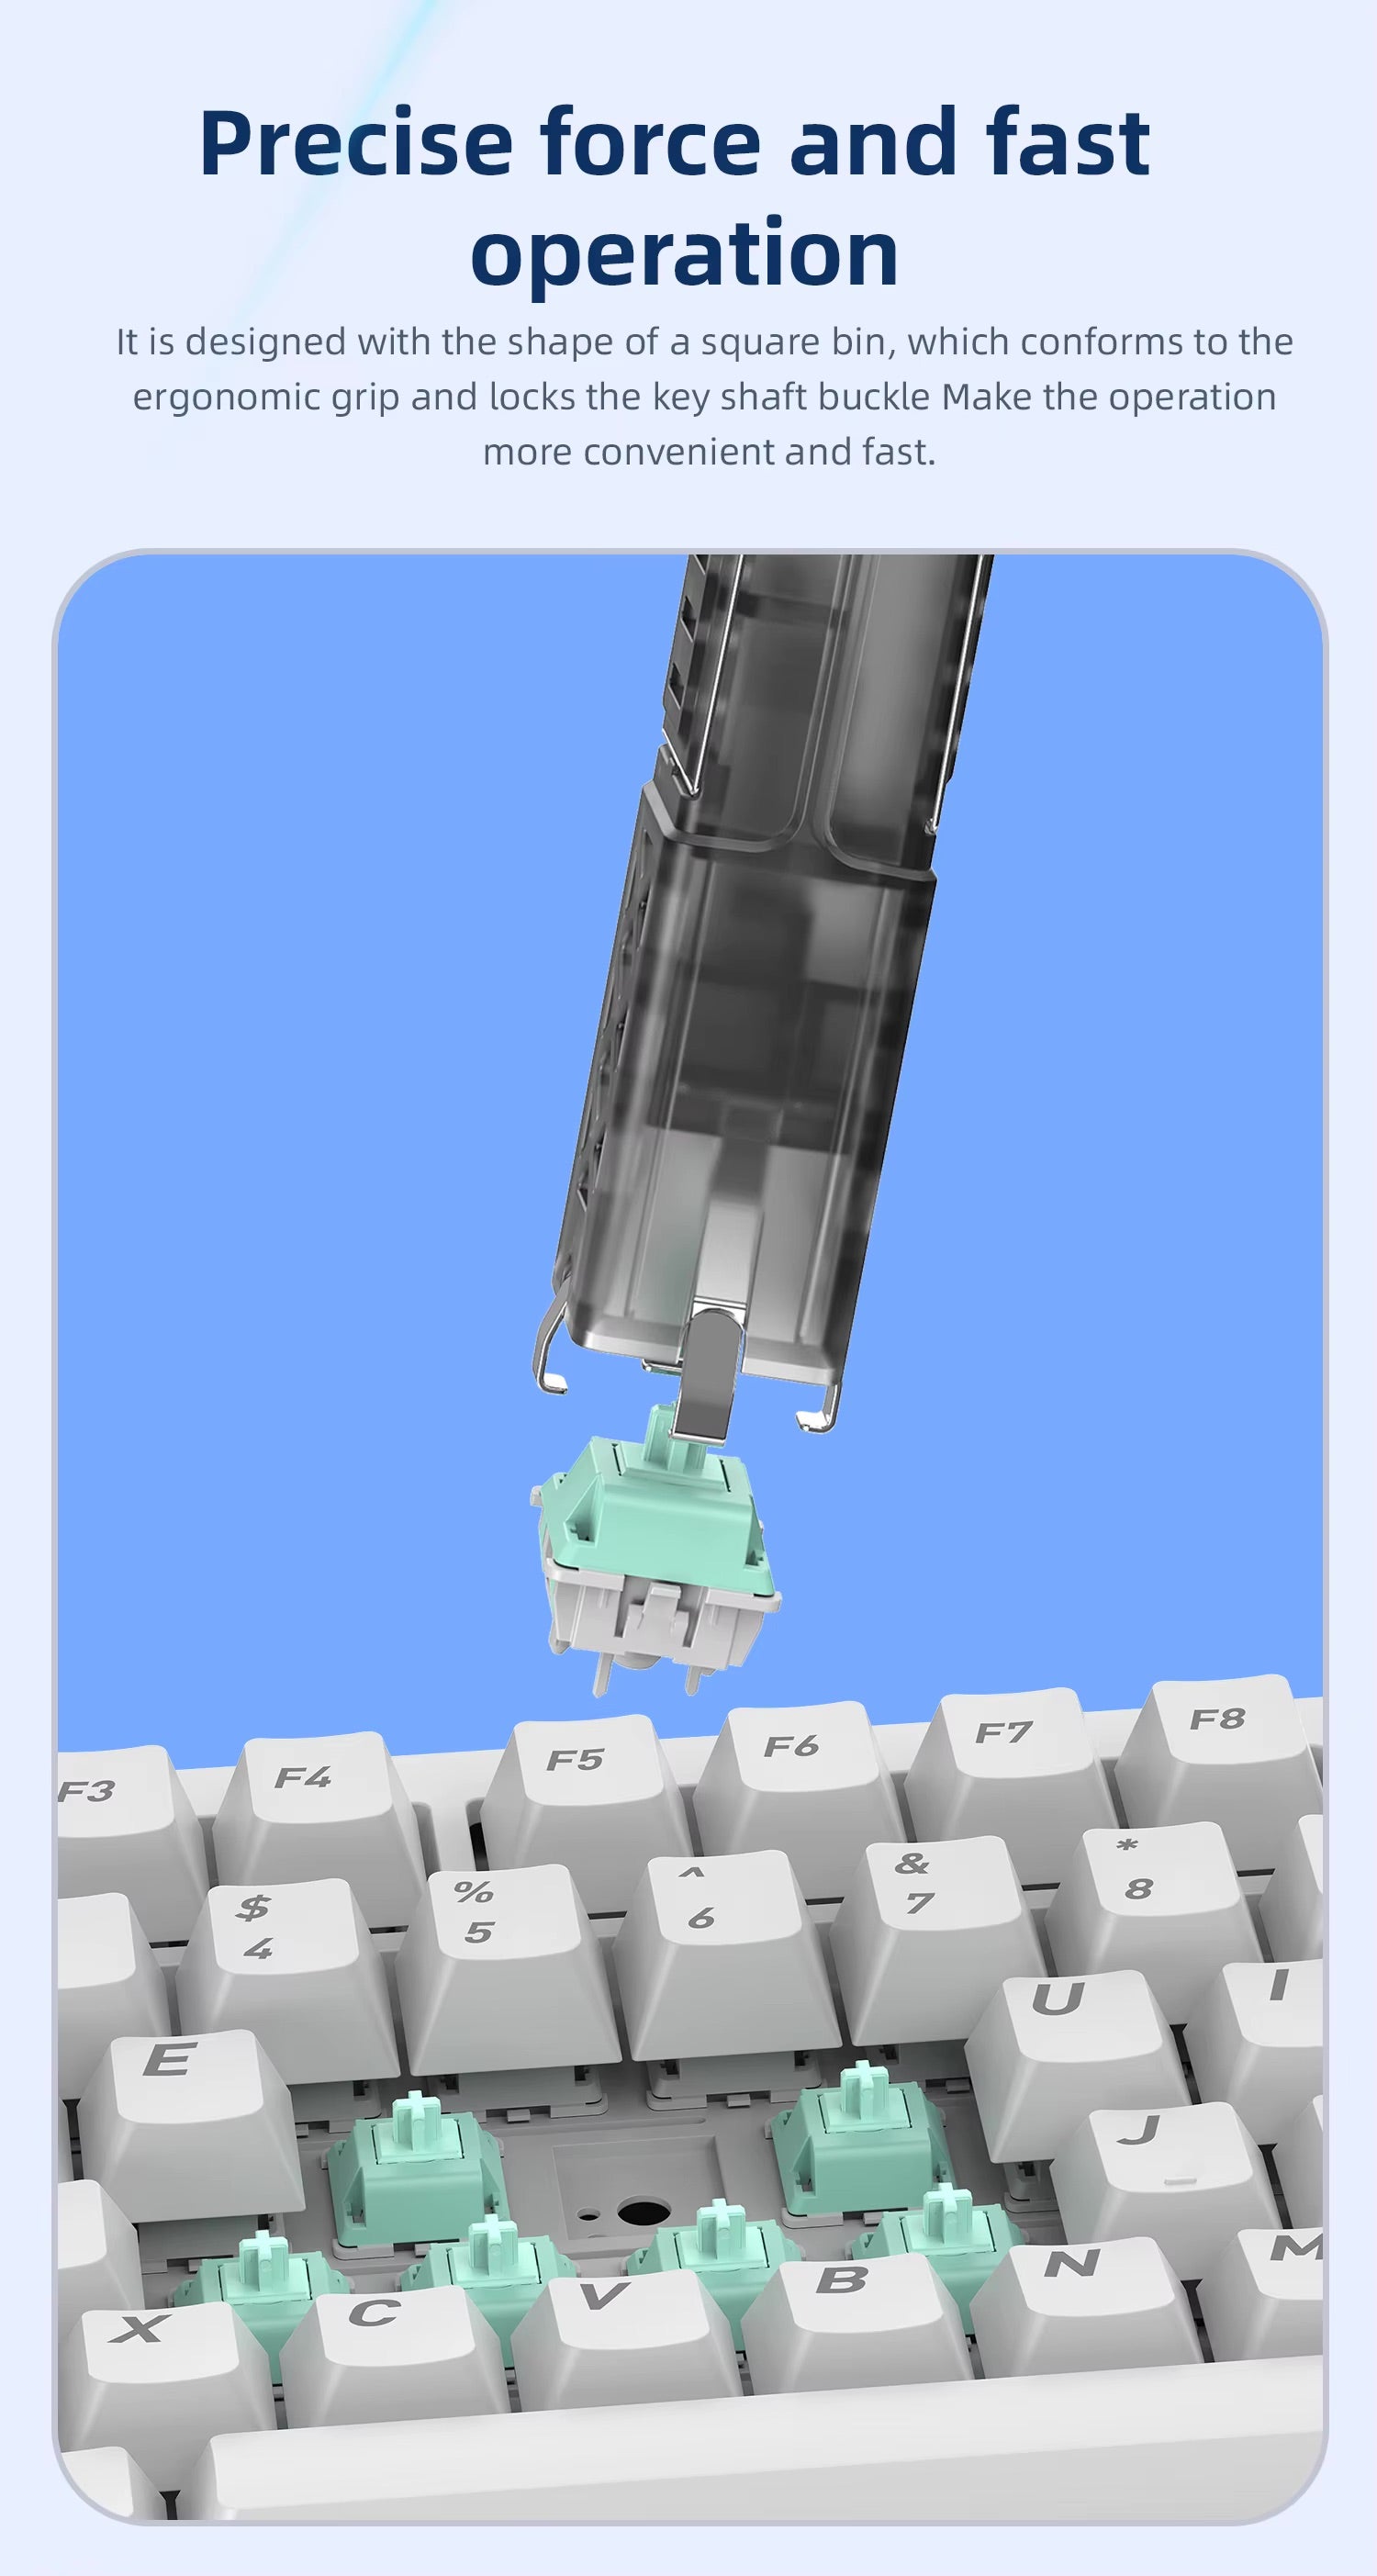
A switch puller is a small tong-style tool — essentially an IC chip extractor — with two claws that grip the switch housing. It only works on hot-swappable keyboards; on a soldered PCB the switch is anchored and must be desoldered. The correct sequence for removing switches from a hot-swap keyboard:
- Remove the keycap first. Always — a switch pulled with the cap on gives you a long lever arm and poor visibility.
- Grip the north and south sides. MX-style switches have retention latches on the top and bottom edges where the housing meets the plate. Those are what the puller must release.
- Squeeze just enough to engage the latches. You will feel them give slightly — over-squeezing is what cracks housings.
- Lift straight up. If it resists, rock gently — north side a fraction, then south — rather than yanking.
- Inspect the pins as it comes out, every time. It takes a second and saves a debugging session later.
Installation is the same discipline in reverse. Line the pins up with the socket holes visually before applying pressure, then press straight down with even force until the switch clicks flush against the plate. If it will not seat with light pressure, something is misaligned — stop and look rather than pushing harder.
How to Avoid Bending Switch Pins (and How to Fix Them)
Bent switch pins are the single most common problem people run into with hot-swap builds, and they usually happen at install rather than removal.
An MX-style switch has two metal contact pins that carry the signal, plus a center plastic post; a 5-pin switch adds two plastic alignment legs either side of it. The metal pins are thin and soft enough to fold flat if they meet plastic instead of a socket hole.
To avoid bending them:
- Inspect every switch before installing it and confirm both pins are straight and parallel. Pins get bent in shipping surprisingly often, straight out of a sealed bag.
- Press vertically, not at an angle. An angled push shears one pin sideways while the other seats.
- Clear debris from empty sockets. Compressed air stops a stray particle from blocking a hole and deflecting a pin.
If a key does not register after a build, bent pins are the first thing to check. Use a key-testing program to find the dead switches, pull them, and straighten the pins with tweezers or fine pliers using light pressure only. Metal fatigues — straightening the same pin repeatedly will eventually snap it.
Mistakes That Damage Keycaps, Switches, and Sockets
- Using a screwdriver, knife, or fingernails — the classic way to gouge a keycap or chip a switch housing.
- Pulling at an angle — the root cause of most keycap cracks, split stems, and bent pins.
- Ring-pulling coated or artisan caps — painted, coated, and resin caps are the ones a ring puller is most likely to mark or crack.
- Forcing a switch that will not seat — resistance means misalignment, never insufficient strength.
- Unnecessary swapping. Hot-swap socket contacts loosen with repeated cycles. Swapping to test is fine; swapping out of boredom shortens the life of the board.
Choosing a Keycap and Switch Puller Tool
When picking a keyboard puller tool, look for:
- A wire or wire-style keycap end rather than a plastic ring, if you own keycaps you care about.
- A switch end sized for MX-style housings, with claws that reach the latches cleanly.
- A comfortable body. A full-size swap is hundreds of repetitions, and a tool that digs into your fingers makes you rush.
- Broad layout compatibility, so one tool covers 60%, 65%, TKL, and full-size boards.
Both Glacier puller tools above are 2-in-1 designs for MX-style switch stems and work across compact, tenkeyless, and full-size layouts. The wider selection sits in keyboard tools and keyboard accessories.
Building a Basic Keyboard Maintenance Kit
A puller is the foundation. A few companions make maintenance far easier:
- A switch tester so you can feel a switch before committing to a full set — a switch keychain tester is the compact version.
- A switch storage case to keep pulled switches sorted and their pins protected rather than loose in a bag. See switch storage options.
- Tweezers for straightening pins and retrieving dropped stabilizer wires, plus compressed air for clearing sockets and the plate while the caps are off.
With the caps already off, it is also the ideal moment to fit a new set from the keycaps collection or try a different feel from key switches.
Frequently Asked Questions
Can you remove keycaps without a keycap puller?
You can, but you should not make a habit of it. Fingers work on tall exposed caps on some layouts. Anything rigid and pointed — screwdrivers, knives, scissors — will eventually scratch a cap or crack a stem, and a dedicated puller costs very little compared to a keycap set.
Do keycap pullers damage keycaps?
Wire pullers generally do not, because they lift from under the bottom edge of the cap. Ring-style plastic pullers can, because they clamp against the widening sides as they are pushed down, risking scratches and finish wear on smooth, coated, or painted caps. Technique still matters more than the tool — any puller used at an angle can damage a keycap.
Can I use a switch puller on a non-hot-swap keyboard?
No. On a soldered PCB the pins are fixed to the board, and pulling on the housing will tear the switch apart or lift the pads off the PCB — those switches must be desoldered. If you are unsure which type you have, pull one keycap and look: a hot-swap board shows a socket surrounding the switch pins.
What do I do if I bend a switch pin?
Remove the switch, then straighten the pin gently with tweezers or fine-nosed pliers until it is straight and parallel to the other pin, and reinstall with the pins visually lined up. If a pin has been bent and straightened several times it may break off — replace the switch rather than fighting it.
How often is it safe to swap switches on a hot-swap keyboard?
Occasional swapping is exactly what hot-swap sockets are designed for. They are mechanical contacts, though, and repeated insertion cycles gradually loosen their grip. Swap freely while dialing in a build, then let the board settle once you have found what you like.
Final Thoughts
Almost every horror story about a ruined keycap set or a dead hot-swap socket traces back to the same two causes: the wrong tool, or the right tool used at the wrong angle. Pull straight up, squeeze only as hard as the latches require, check the pins every time, and stop the moment something resists.
Get those four habits right and a keycap and switch puller turns a keyboard from a fixed object into something you can genuinely tune — new caps on a whim, a different switch feel for a different game, a proper clean twice a year — with no risk to the parts you paid for.


