

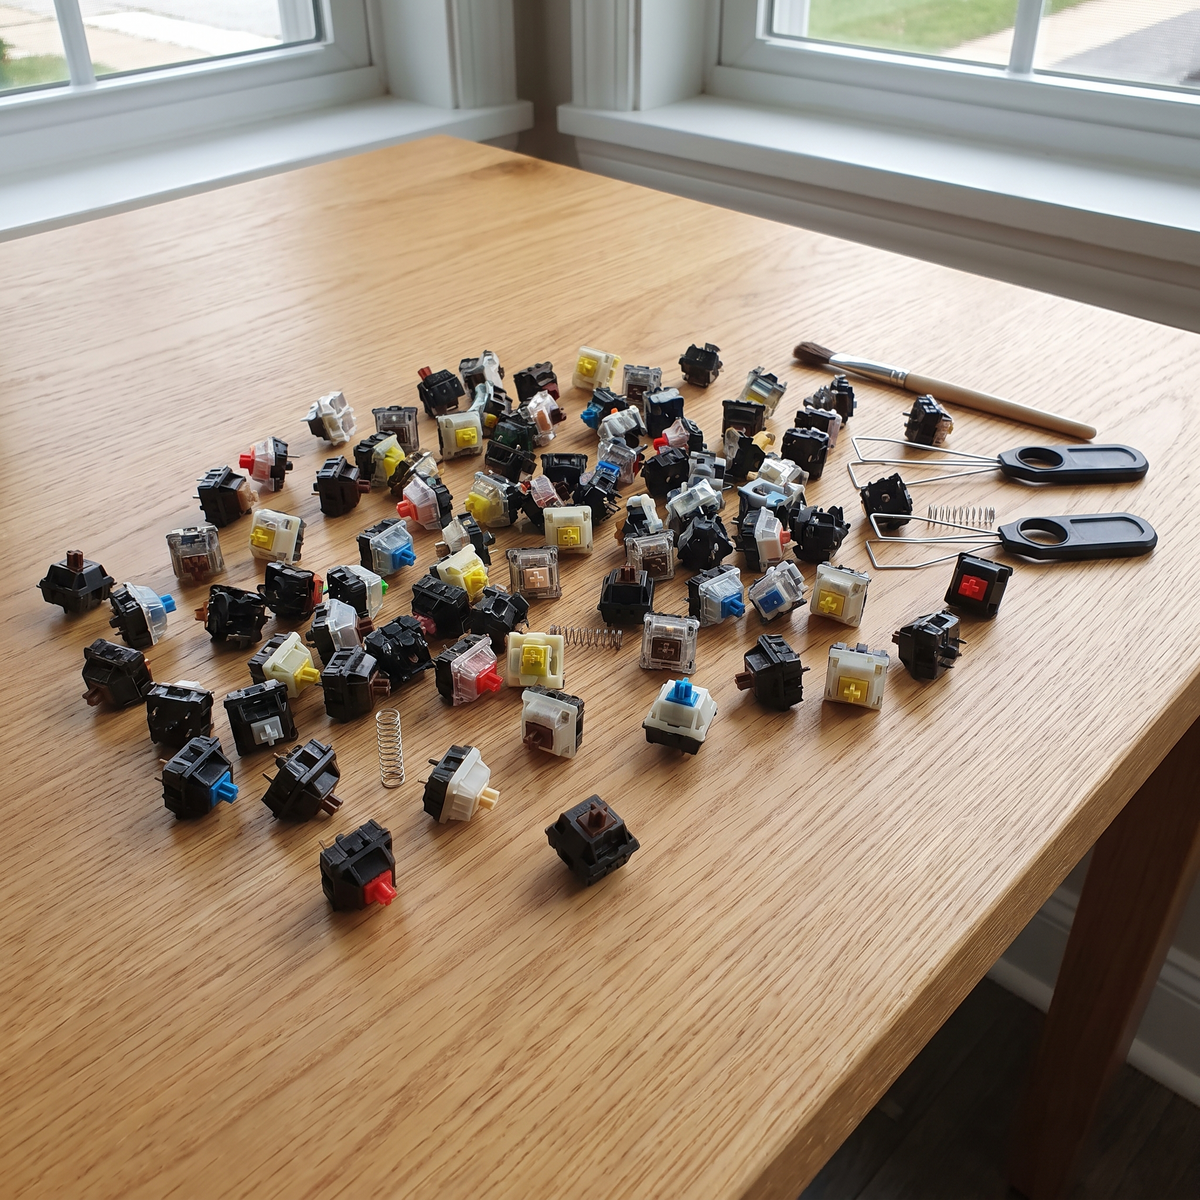
How to Lube Mechanical Keyboard Switches: A Complete Step-by-Step Guide
Learning how to lube mechanical keyboard switches is the single mod that changes typing feel more than almost anything else you can do to a board. A scratchy stock switch drags against its housing on every press. A properly lubed switch glides. If you have ever wondered why lubed switches sound deeper and feel smoother, or whether hand lubing your switches is worth the hours it takes, this guide walks through the whole process: which switches to lube, which lubricant thickness to use, exactly where the lube goes, and the mistakes that ruin a set.
This is a practical guide for hot-swap and custom keyboard builders. You do not need a soldering iron, and you do not need to be an experienced modder. You do need patience, good lighting, and a very light touch.
What Lubing Keyboard Switches Actually Does
A mechanical switch is four parts: a top housing, a stem, a spring, and a bottom housing that holds the metal leaf. Every keystroke slides the plastic stem against plastic rails inside the housing, and compresses a steel spring inside a guide tube. Both of those movements generate friction and noise.
Applying a thin film of lubricant between those surfaces does three things:
- Removes scratchiness by separating the stem from the housing rails, which is the biggest single improvement most people notice.
- Quiets spring ping, the thin metallic ringing that comes from the spring vibrating in its guide tube.
- Deepens the sound signature, shifting a sharp, high-pitched clack toward a lower, fuller tone.
What lubing switches will not do is fix a rattling stabilizer, a hollow case, or a badly seated plate. Those are separate mods. If your board rattles on the spacebar, tuning the stabilizers will do far more for you than lubing switches will.
Which Switches Should You Lube and Which to Leave Alone
Not every switch benefits. Before you open a hundred switches, work out which category yours falls into.
- Linear switches are the ideal candidate. They have no tactile bump to protect, so you can lube the stem and housing generously and the result is pure smoothness. If you are new to hand lubing, start with linear switches.
- Tactile switches can be lubed, but carefully. Lubricant on the tactile legs or the leaf rounds off the bump, and a light tactile can end up feeling almost linear. Use a thinner lubricant and keep it off the legs. Browse tactile switches if you want to see the range of bump strengths available.
- Clicky switches should not be lubed at all in the click mechanism. Lube dampens the click jacket or click bar that creates the sound, which defeats the point of buying clicky switches in the first place.
- Silent switches already contain dampening pads. Extra lubricant can make them feel mushy rather than crisp, so most people leave them stock.
- Magnetic and Hall effect switches use a completely different internal design built around a magnet in the stem, and they generally arrive factory lubed. Hand lubing is not part of a normal magnetic keyboard workflow.
What You Need Before You Start Lubing Switches
The tool list for a switch lubing session is short, and none of it is exotic:
- A switch puller to remove switches from a hot-swap PCB without bending the pins. A two-in-one tool like the Glacier Keycap/Key Switch Tool handles keycaps and switches with one tool, and the Glacier Keycap/Switch Puller Tool is a sturdier option for repeat use. Both live in the keyboard tools collection.
- A switch opener sized for your switch type. Most MX-style switches share one latch layout, while Box-style housings use a different one, so check that your opener supports the switches you own.
- A fine brush, size 00 or smaller. A large brush holds far too much lubricant and makes over-application almost inevitable.
- Tweezers for handling springs and stems without dropping them.
- Two lubricants, or at least one: a thicker grease for linear switches, and a thinner oil-type lubricant for tactiles and springs. Never substitute household oils or general-purpose penetrating sprays, which attack switch plastics and migrate onto the PCB.
- A tray or storage case so parts stay sorted. A switch storage case such as the Kailh Switches Storage keeps finished switches separated from unfinished ones, which matters a lot at switch number sixty.
Set up on a flat, well-lit surface. Springs launch across rooms, and stems are easy to lose on patterned desk mats.
How to Lube Switches Step by Step
Work in batches of ten to twenty. Trying to disassemble an entire set at once turns into a pile of unmatched parts.
- Pull the switches. Grip each switch with the puller at the top and bottom latches, not the sides, and lift straight up. Pulling at an angle is the most common way to bend switch pins.
- Open the housing. Seat the switch in the opener and press down evenly. The top housing separates from the bottom, leaving the stem and spring loose. Do this over a tray so nothing scatters.
- Separate the parts. Sort into four groups: top housings, bottom housings, stems, and springs.
- Lube the stem. Load a trace of lubricant onto the brush, wipe most of it off, and paint a thin, even coat on the four vertical rails and the sides of the stem that contact the housing. On tactile switches, keep lubricant off the legs that ride the leaf.
- Lube the bottom housing. Coat the vertical rails the stem slides against, and put a very thin film inside the spring guide tube. Too much lubricant in the tube produces a wet squelching noise as the spring compresses.
- Lube the top housing. Brush a light coat on the rails around the stem opening. This is the step most people skip, and it is where a surprising amount of remaining scratch comes from.
- Handle the springs. Either brush both ends of each spring, or use the bag method described below.
- Reassemble. Spring into the bottom housing, stem on top of the spring, top housing pressed down until the latches click. Make sure the stem is oriented correctly before closing, or the switch will not travel.
- Test before you commit. Press each rebuilt switch by hand. It should return crisply with no grinding and no hesitation. Reinstall a few and type on them before doing the rest of the board.
Beginners should lube one switch first, reassemble it, and compare it directly against a stock one. That single comparison teaches more about the right amount of lubricant than any written instruction.
How Much Lube Is Too Much?
Over-lubing is the number one mistake, and it is far harder to fix than under-lubing. Signs you have used too much:
- The stem returns slowly or feels sluggish at the top of the travel.
- You can see lubricant pooling in the housing corners or bridging between surfaces.
- The switch makes a wet, sticky sound instead of a clean one.
- A tactile switch has lost most of its bump.
The target is a film so thin you can barely see it, not a visible coating. If a switch looks glossy and wet after assembly, you have overshot. The fix is disassembly and wiping the parts clean with a lint-free cloth, which is why testing a single switch before batch-processing saves so much time.
Should You Lube Switch Springs?
Spring lubing is mostly a sound mod rather than a feel mod. It targets spring ping, the thin ringing tail after a keypress that is especially audible in aluminum cases. Two approaches work:
- Brush lubing puts a small amount of thin oil on each end of the spring where it contacts the stem and the housing. It is precise but slow.
- Bag lubing puts a full set of springs in a sealed bag with a few drops of thin oil, then shakes the bag until every spring is coated. It is far faster and covers the whole spring, though it uses more lubricant and gives you less control.
Bag lubing is the usual choice when doing a full 70 to 105 switch set, since brushing individual springs roughly doubles the total time.
How Long Does It Take to Lube a Full Keyboard?
Be realistic. A first-time builder should budget a couple of hours or more for a full set, and experienced builders still spend a meaningful evening on it. The time breaks down roughly into pulling and opening, applying lubricant, and reassembly, with the application step taking the largest share.
That time cost is the honest argument against hand lubing. If you want the sound and feel benefits without the session, the alternative below is genuinely good now in a way it was not several years ago.
When Factory Pre-Lubed Switches Make More Sense
Factory lubing has improved substantially. Many current switches ship with a usable coat applied during assembly, and for most people that is enough. Pre-lubed options across the key switches range, including the Gateron G Pro 3.0 Switches, get you most of the way there with none of the labor.
Hand lubing is still worth doing when you want a specific sound signature, when you are working with an older or budget switch that shipped dry, or when you simply enjoy the process. It is not a requirement for a good-sounding keyboard, and treating it as one is how people end up abandoning half-finished builds.
Frequently Asked Questions About Lubing Keyboard Switches
Do you have to desolder switches to lube them?
Only on a soldered PCB. On a hot-swap board you pull the switches out with a switch puller, lube them, and press them back in, which is why hot-swap keyboards are the easier platform for this mod. On a soldered board every switch has to be desoldered and resoldered, which is a much larger job.
Can you lube switches without opening them?
Not properly. Some people drip lubricant into an assembled switch through the stem opening, but the lubricant lands unevenly, cannot reach the housing rails, and often ends up on the leaf contacts. It usually makes the switch feel worse rather than better. Opening the housing is the only way to control where the lubricant goes.
Does lubing switches make them faster for gaming?
No. Lubricant does not change the actuation point, the travel distance, or the electrical response of the switch, so it does not make a switch register any sooner. It changes smoothness and sound. If your goal is faster actuation, adjustable actuation on a magnetic keyboard is the feature that actually addresses that, not lubricant.
How often do lubed switches need re-lubing?
Rarely. A properly applied coat lasts for years of normal use. Re-lubing is generally only worth considering if a switch develops noticeable scratchiness again, or if you disassemble the board for another reason and want to refresh it while everything is already apart.
Is it worth lubing budget switches?
Often yes, and this is where hand lubing gives the biggest return. Inexpensive dry switches typically have the most housing scratch to remove, so the before-and-after difference is dramatic. On a premium switch that already ships well lubed from the factory, the improvement is much smaller and may not justify the hours.
The Practical Takeaway on Lubing Switches
Lubing mechanical keyboard switches is a slow, repetitive mod with a genuinely large payoff on the right switches. Start with linears, use less lubricant than you think you need, test a single switch before you commit to a full set, and keep lubricant away from tactile legs and clicky mechanisms entirely. Pair it with a decent puller, a sorted storage case, and an honest assessment of whether your switches actually need it, and you will get a smoother, deeper-sounding keyboard without wasting an evening on switches that were already fine.


