

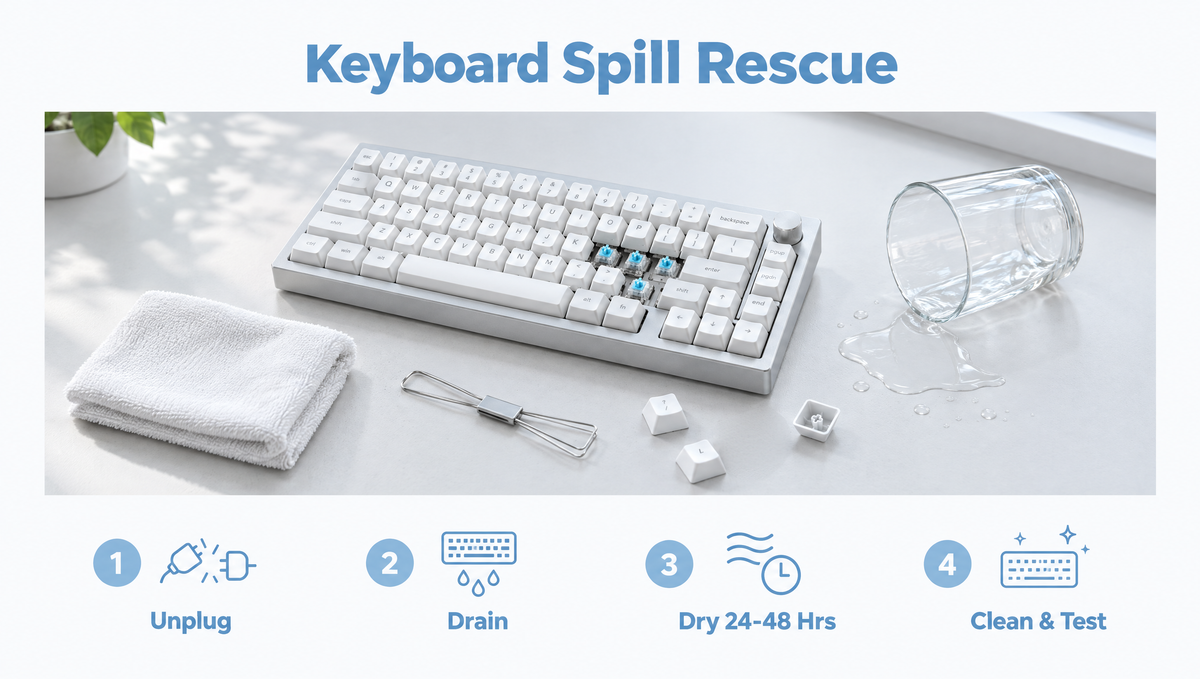
Spilled Water on a Mechanical Keyboard? Don't Panic
If you just spilled water on your mechanical keyboard, the next few minutes matter more than anything else. Most mechanical keyboards survive a spill when the owner acts quickly: cut the power, drain the liquid, and give everything time to dry completely before plugging it back in.
This guide walks you through what to do after a keyboard spill, step by step. It covers plain water, coffee, tea, soda, and energy drinks, how to fix sticky keys after a spill, and why a hot-swappable keyboard is much easier to rescue than a soldered one.
Step 1: Unplug the Keyboard Immediately
Electricity plus liquid is what turns a small spill into a dead PCB. Before you do anything else:
- Wired keyboards: pull the USB cable out of the computer or the keyboard. Don't just eject it in software or put the PC to sleep.
- Wireless keyboards: switch the keyboard off with its power switch. If the manufacturer's instructions show how to disconnect the battery safely, do that once the board is open. Don't plug it in to charge.
- Don't test it yet. Pressing keys to "see if it still works" while it's wet and powered is how short circuits happen.
Step 2: Flip It Over and Drain the Liquid
Turn the keyboard upside down right away so gravity pulls liquid away from the PCB. Tilt it gently in a few directions over a towel to let liquid run out of the switches and case.
- Blot the visible liquid with a lint-free cloth or paper towel.
- Don't shake it hard, which can push liquid deeper into the case.
- Avoid blowing compressed air into wet switches. It can drive liquid further into the switch housings instead of getting it out.
Step 3: Remove the Keycaps
With the board still unplugged, pull all the keycaps so you can see where the liquid went and let air reach the switches. Use a proper wire keycap puller and pull straight up to avoid scratching keycaps or snapping stabilizer inserts. Our guide on using a keycap puller and switch puller without damage covers the technique.
Take a quick photo of your layout first if your keycap set uses different row profiles. That makes putting it back together much easier.
Wash the keycaps separately in a bowl of warm water with a little mild dish soap, rinse them, and let them dry completely on a towel. Keycaps are easy to clean, so focus your energy on the board itself.
Step 4: Identify What You Spilled
What you spilled decides how much cleaning you need. Water damage on a keyboard is usually the easiest case, while sugary drinks leave residue that causes trouble long after the liquid is gone.
- Plain water: the main job is drying. Small amounts of clean water often leave little or nothing behind once they evaporate.
- Coffee or tea without sugar: treat it like water, but expect some residue around the affected switches.
- Soda, juice, energy drinks, or sweetened coffee: the water evaporates but the sugar stays. That sticky film is what makes switches feel gritty, slow to return, or stuck down.
- Milk or creamy drinks: clean these quickly and thoroughly, since residue can spoil and smell.
Step 5: Dry the Keyboard Thoroughly
For a plain water spill, the most important ingredient is time. Leave the keyboard upside down or on its side in a warm, dry, well-ventilated room. Most spill guides and enthusiasts recommend at least 24 to 48 hours of drying before you reconnect it, and longer if a lot of liquid got inside.
- Do use a fan to move air across the board.
- Don't use a hair dryer on high heat, a heater, or an oven. Heat can warp plastic parts, damage foam, and stress components.
- Don't bury it in rice. Rice doesn't dry electronics better than open air, and dust and grains can end up inside switches.
If your keyboard has case foam or PCB foam, check it. Foam soaks up liquid and holds onto moisture for a long time. Take it out if you can, squeeze it gently in a towel, and let it dry on its own, or replace it if a sugary drink soaked it.
Step 6: Clean Sticky Switches After a Spill
If you spilled something sugary, drying alone usually isn't enough. Here's how to fix sticky keys after a spill, depending on your keyboard.
Hot-swappable keyboards
This is where a hot-swap keyboard pays off. Use a switch puller to remove the affected switches so you can clean them on their own and inspect the PCB underneath.
- Pull the switches straight up, squeezing both clips evenly, so you don't damage the hot-swap sockets.
- Flush lightly affected switches with high-concentration isopropyl alcohol (IPA), ideally 90% or higher, and actuate them repeatedly to work it through. High-purity IPA evaporates quickly and leaves very little water behind.
- For badly gummed-up switches, open them with a switch opener and clean the housing, stem, and spring individually.
- Let every part dry fully before reassembling.
Soldered keyboards
On a soldered board you can't pull the switches without desoldering. Work from the top instead: with the keyboard unplugged and keycaps off, apply a few drops of high-concentration IPA into the affected switches and press each one repeatedly to break up residue. Repeat until the key moves smoothly, then let the board dry fully.
Expect to relube
Alcohol and water flushes can wash away or disturb the factory lube on pre-lubed switches. If a cleaned switch feels scratchy afterward, relubing it usually restores the feel. Our switch lubing guide walks through the process.
Step 7: Inspect the PCB for Residue and Corrosion
Once the board is dry, look closely at the PCB where the liquid landed, especially around switch sockets, diodes, and the USB port. Signs of trouble include:
- A dried, shiny, or sticky film on the board
- White, green, or crusty deposits that suggest corrosion
- Discolored areas around components
Clean residue gently with a soft brush dampened with high-concentration isopropyl alcohol, then let it evaporate completely. The sooner residue is cleaned off, the less chance it has to cause long-term corrosion.
Avoid soaking keycaps, painted parts, or RGB diffusers in alcohol. Test any cleaner on a hidden spot first if you're unsure how a finish will react.
Step 8: Reassemble and Test Every Key
When you're confident everything is completely dry, reassemble the board and plug it in. Then test every key with your keyboard's software or an online key tester.
- A key doesn't register: on a hot-swap board, reseat the switch and check for bent pins. Our guide to fixing a hot-swap key that's not working can help.
- A key repeats or chatters: residue may still be inside the switch. Clean it again or replace it.
- A key feels sticky but works: repeat the switch cleaning step or swap in a fresh switch.
- Nothing works at all: stop, unplug it, and give it more drying time before trying again. If it still won't power on, the PCB may need professional repair or replacement.
A dead or sticky switch isn't the end of a hot-swap keyboard. You can replace just the damaged ones with fresh mechanical keyboard switches and keep the rest of your board as it is.
Do Magnetic and Hall Effect Keyboards Handle Spills Better?
Magnetic switches don't rely on metal contact leaves inside the switch, so there are fewer metal contacts in the switch itself to corrode. However, the Hall effect sensors live on the PCB, alongside the rest of the electronics, and they're just as vulnerable to liquid. Sugary residue can still make a magnetic switch feel sticky.
Treat a magnetic keyboard exactly like any other board after a spill: unplug, drain, dry, clean, and test. After it's dry, it's also a good idea to run the keyboard's calibration in its software, since cleaning and reseating switches can change the readings.
How to Prevent Keyboard Spills
The best spill fix is the one you never need. A few simple habits go a long way:
- Use a spill-proof or lidded mug at your desk.
- Keep drinks on the side of the desk away from your mouse hand and keyboard.
- Choose a hot-swappable keyboard so a damaged switch is a quick swap, not a soldering job. Many of our keyboard kits are built around hot-swap PCBs.
- Keep a few spare switches organized in a switch storage case so replacements are ready when you need them.
- Clean your board regularly so a small spill doesn't combine with dust and crumbs. Our mechanical keyboard cleaning guide covers routine maintenance.
Keyboard Spill FAQ
Can a mechanical keyboard survive water damage?
Often, yes. If you unplug it immediately, drain it, and let it dry completely before powering it on again, many mechanical keyboards recover fully from a plain water spill. The biggest risk is plugging it in while it's still wet.
How long should a keyboard dry after a spill?
Give it at least 24 to 48 hours in a warm, dry, ventilated room, and longer if a lot of liquid got inside or the board has foam that soaked up liquid. When in doubt, wait longer.
Should I put my keyboard in rice?
No. Rice doesn't dry a keyboard better than open air with good airflow, and dust or grains can get into the switches. A fan and patience work better.
Why are my keys sticky after a spill?
Sugar and other dissolved ingredients stay behind when the liquid evaporates, leaving a film on the switch stems and housings. Flushing the switches with high-concentration isopropyl alcohol, or pulling and cleaning them on a hot-swap board, removes the residue.
Can I use isopropyl alcohol on a mechanical keyboard?
Yes, high-concentration isopropyl alcohol is commonly used to clean switches and PCB residue because it evaporates quickly. Only use it with the keyboard unplugged, avoid soaking keycaps or painted parts, and expect that cleaned switches may need relubing.


